 9 min read




How to Read Roof Plans for a Complete Material Takeoff
A roofing material takeoff can look simple from a distance: measure the roof area, convert it into squares, and order the covering. In practice, that approach misses many of the items that determine whether a roofing bid is complete. Roof plans contain information about pitch, drainage, edges, penetrations, flashing conditions, roof systems, and transitions that must be interpreted before quantities are measured.
For contractors and estimators, learning how to read roof plans is therefore just as important as knowing how to measure them. A complete takeoff should connect the roof plan with elevations, sections, details, schedules, and specifications so that the quantities reflect the full roofing scope rather than only the visible field area.
This guide explains how to read roof plans step by step and translate the drawings into a material takeoff that is easier to price, review, and use for bidding.
What Is a Roof Plan?
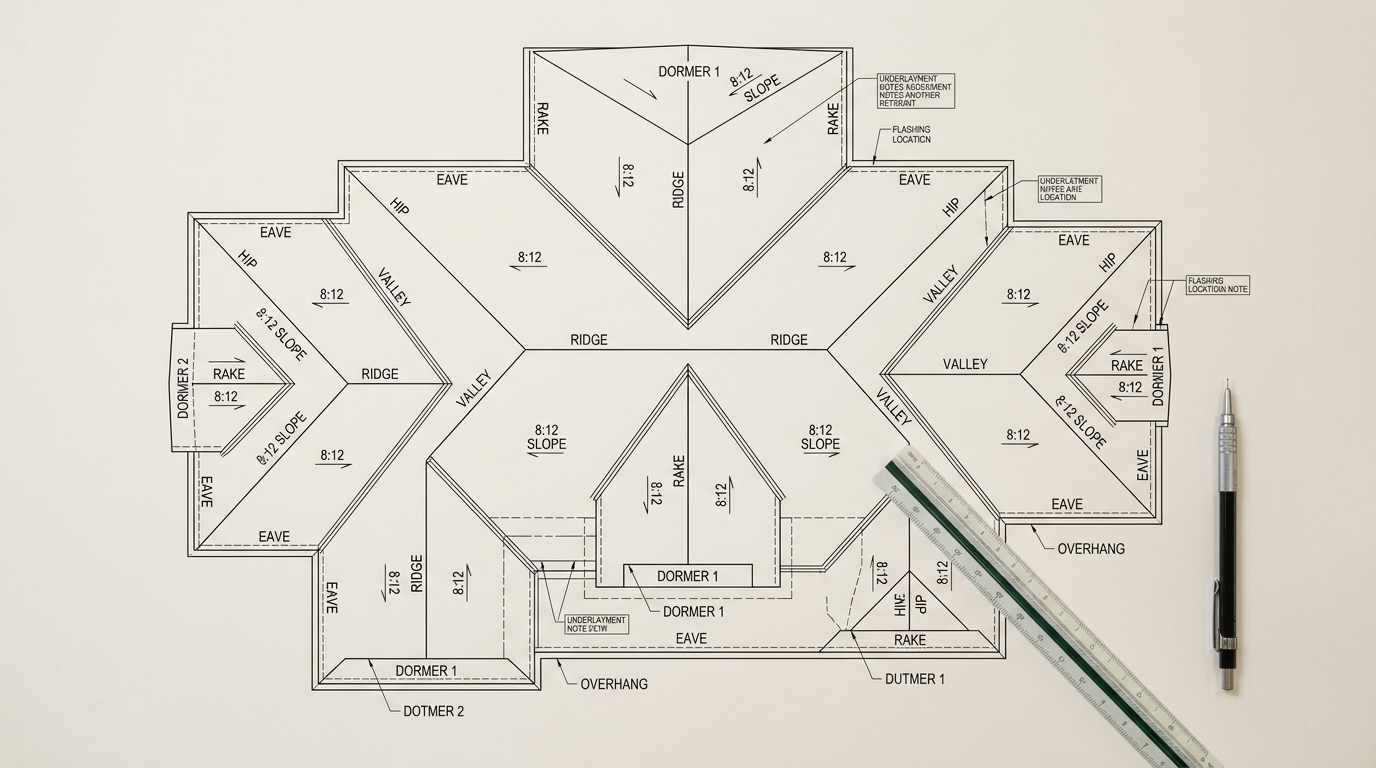
A roof plan is a top-down drawing that shows the layout and geometry of the roof. Depending on the project, it may identify roof boundaries, slopes, ridges, hips, valleys, drains, scuppers, gutters, downspouts, equipment curbs, skylights, roof hatches, penetrations, and different roofing systems.
The roof plan is the starting point, but not the only source. Elevations may confirm heights and slopes; sections show assemblies; details explain flashing, curbs, parapets, and transitions; and specifications identify materials and installation requirements. Measuring only the roof plan can therefore leave substantial scope uncounted.
Step 1: Confirm the Drawing Scale and Revision
Before measuring anything, confirm that you are working from the latest drawing set and review the title block, issue date, revision number, and addenda.
Next, verify the scale. Printed scales can become unreliable when drawings are resized, scanned, or exported to PDF. In digital takeoff software, calibrate the sheet against a known dimension before tracing roof areas or linear items.
A small scale error can affect every quantity measured from the page. For that reason, scale verification should happen before the first roof plane is measured.
Review general notes as well. They often point to structural, mechanical, or specification information that is not fully shown on the roof plan.
Step 2: Identify Every Roof Area and Roofing System
Break the roof into measurable zones before calculating quantities.
On a residential or steep-slope project, the roof may contain several planes with different pitches, dormers, porches, canopies, or lower roofs. On a commercial project, separate areas may use different membrane systems, insulation thicknesses, cover boards, coatings, or metal roofing.
Create a roof-zone list such as:
- Roof Area A — architectural shingles, 6:12 pitch
- Roof Area B — standing-seam metal, 3:12 pitch
- Roof Area C — TPO membrane over tapered insulation
- Canopy Roof D — modified bitumen
Keeping systems separate prevents unlike materials from being combined and makes pricing and scope review easier.
Step 3: Read Roof Pitch Correctly
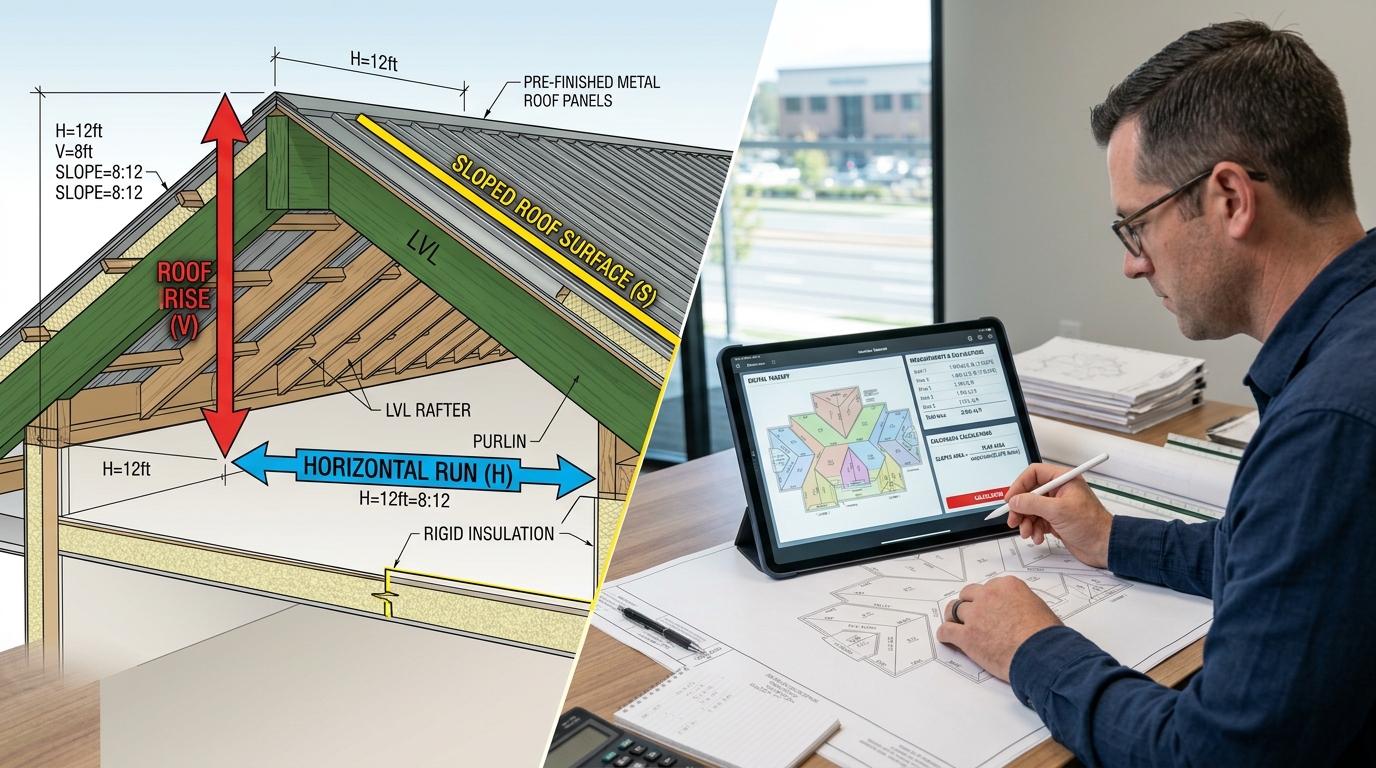
Pitch is one of the most important measurements on a sloped roof. In U.S. drawings, it is commonly expressed as rise over 12 inches of horizontal run, such as 4:12, 6:12, or 9:12.
The area shown in plan view is a horizontal projection. A pitched roof has a larger actual surface area, so the plan area must be adjusted when the drawing does not already provide true sloped dimensions.
A useful pitch-factor formula is:
Pitch factor = √(1 + (rise ÷ run)²)
For a 6:12 roof:
√(1 + (6 ÷ 12)²) ≈ 1.118
If the horizontal plan area is 2,000 square feet, the approximate sloped surface area is:
2,000 × 1.118 = 2,236 square feet
When different roof planes have different pitches, calculate them separately rather than applying one factor to the entire roof.
Step 4: Trace Ridges, Hips, Valleys, Eaves, and Rakes
Area alone does not produce a complete roofing takeoff. Many materials are driven by linear measurements.
Measure and classify:
- Eaves
- Rakes
- Ridges
- Hips
- Valleys
- Parapet walls
- Roof-to-wall transitions
- Expansion joints
- Fascia and coping
- Gutters and downspouts
These measurements can determine quantities for starter strips, ridge or hip caps, drip edge, valley material, flashing, termination bars, coping, fascia, gutters, and other accessories.
Do not combine all roof edges into one perimeter value. Eaves, rakes, parapets, and wall terminations can require different assemblies, so keep each condition separate.

Step 5: Count Every Opening and Penetration
Roof penetrations create both material and labor requirements. They are easy to overlook because they may appear as small symbols on a large roof plan.
Count items such as:
- Plumbing vents
- Mechanical and exhaust penetrations
- Roof drains and overflow drains
- Scuppers
- Skylights
- Roof hatches
- Equipment curbs
- Chimneys
- Pipe supports
- Pitch pockets
- Sleeves and miscellaneous penetrations
Then follow the detail references. A single rooftop unit may require curb flashing, membrane reinforcement, insulation transitions, fasteners, sealants, and metal counterflashing.
Record not just the number of penetrations, but their type or detail condition whenever the documents provide it.
Step 6: Read Sections and Roofing Details Before Finalizing Quantities
This is where many incomplete takeoffs can be improved.
Follow roof-plan callouts to sections and details before finalizing the material list.
For a steep-slope assembly, details may identify decking, underlayment, leak barrier, shingles or panels, ridge ventilation, starter material, and flashing.
For a low-slope commercial roof, the assembly may include vapor retarder, multiple insulation layers, tapered insulation, cover board, membrane, attachment components, walkway pads, and flashing.
Details also clarify how the roof terminates at parapets, edges, curbs, expansion joints, and walls. These conditions often create quantities that cannot be calculated accurately from roof square footage alone.
Step 7: Check Specifications and Schedules
The drawings tell you where materials occur. Specifications usually tell you exactly what those materials must be.
Review the roofing specification sections for information such as:
- Roofing system type
- Shingle, tile, panel, or membrane requirements
- Membrane thickness
- Insulation type and thickness
- Cover-board requirements
- Underlayment
- Fasteners and attachment method
- Flashing materials
- Sealants
- Accessories
- Manufacturer requirements
- Warranty-related system components
Schedules may also identify roof types or assembly designations referenced on the plan.
If the plan says “Roof Type R-2,” the estimator should locate the R-2 definition rather than assuming it matches another roof area.

Step 8: Convert Measurements into Material Quantities
Once the roof geometry and assemblies are understood, organize the takeoff by unit. Contractors who need detailed measurements across roofing and other construction scopes can also use professional quantity takeoff services to turn project drawings into organized material quantities.
Area Quantities
Use square feet or roofing squares for materials such as shingles, membranes, underlayment, insulation, cover board, vapor barriers, coatings, and roof decking.
One roofing square equals 100 square feet of roof surface. Therefore, a 2,500-square-foot roof equals 25 roofing squares before purchasing allowances are applied.
Linear Quantities
Use linear feet for ridge cap, starter, drip edge, coping, fascia, gutters, flashing, valleys, wall transitions, termination bars, and similar continuous items.
Count Quantities
Use each or count for drains, scuppers, pipe boots, skylights, vents, hatches, curbs, downspout outlets, and other discrete components.
This separation makes the takeoff easier to price and review.
Step 9: Apply Waste and Product Coverage Carefully
Net measured quantity and material-to-order quantity are not always the same.
Shingles, membranes, insulation boards, metal panels, underlayment, flashing, and other products may require additional material for cuts, laps, seams, starter pieces, patterns, packaging, or unavoidable waste.
Do not apply one universal waste percentage to every roofing project. A simple gable roof and a roof with multiple dormers, valleys, hips, penetrations, and short planes do not create the same cutting conditions.
Instead, evaluate roof complexity, product dimensions, layout, specified laps, manufacturer coverage, and project requirements. Record the allowance separately so reviewers can distinguish measured scope from purchasing assumptions.
Step 10: Review the Takeoff Against the Complete Roofing Scope
Before pricing the job, perform a final scope check.
Ask:
- Did every roof plane receive the correct pitch?
- Are all roof systems separated?
- Were eaves, rakes, ridges, hips, and valleys measured?
- Were parapets and wall transitions included?
- Were drains, scuppers, curbs, vents, and skylights counted?
- Were underlayment, insulation, cover board, and vapor-control layers included where specified?
- Were flashing and edge-metal conditions taken from the details?
- Were roof accessories and ventilation included?
- Were alternates and addenda reviewed?
- Are assumptions and exclusions documented?
A color-coded roof markup helps reviewers compare the quantity report with the drawing and see what was measured.

Common Roof Plan Takeoff Mistakes
Several errors repeatedly cause roofing quantities to be understated.
The first is measuring the building footprint and treating it as the actual roof surface without accounting for pitch. Another is calculating only field material while ignoring linear accessories and penetrations.
Estimators can also miss scope when they stay on one drawing sheet. Roof details, wall sections, mechanical plans, plumbing plans, and specifications may contain information that changes the roofing quantity.
Another common mistake is combining different roof systems into one total. When membrane, metal, shingles, or different insulation assemblies are mixed together, the takeoff becomes harder to price and review.
Finally, failing to track drawing revisions can make an otherwise accurate takeoff obsolete before the bid is submitted.
What Should a Complete Roofing Material Takeoff Include?
A well-organized roofing takeoff should provide enough detail for the estimator to understand both the field coverage and the supporting scope.
Depending on the project, that may include roof covering, membrane or shingles, underlayment, insulation, cover board, vapor barriers, starter strips, ridge and hip caps, valleys, flashing, coping, fascia, drip edge, gutters, downspouts, drains, scuppers, curbs, roof hatches, skylights, vents, pipe boots, fasteners, sealants, walkway materials, and demolition or tear-off quantities.
The exact list depends on the specified roof system, which is why the plans and specifications should always be read together.
From Roof Plans to a Bid-Ready Takeoff
Reading roof plans for a material takeoff is not simply a measuring exercise. It is a scope-coordination process. Start by verifying the scale and drawing revision. Separate roof zones and systems. Confirm pitch and calculate true sloped areas where required. Measure linear roof conditions, count penetrations, follow detail references, and verify every assembly against the specifications.
When those steps are completed systematically, the takeoff becomes more than a square-foot total. It becomes a reviewable material map that supports supplier pricing, labor planning, and a more complete roofing bid.
The takeoff is also only one part of preparing a complete bid. Contractors who need labor, material, equipment, overhead, and project cost calculations can use professional construction estimating services to develop a more complete estimate from the project drawings and specifications.
Contractors who do not have enough internal estimating capacity can also use professional roofing estimating services to convert drawings and specifications into organized roofing quantities, marked-up plans, and bid-ready cost information.